Set up Azure
- 01 May 2024
- Print
- PDF
Set up Azure
- Updated on 01 May 2024
- Print
- PDF
Article Summary
Share feedback
Thanks for sharing your feedback!
SysAid’s Azure integration allows you to more efficiently manage the users in your company from one central location, by automatically pulling user data from Azure to SysAid. The integration runs these data imports about every 24 hours; saving time and preventing human error that could occur from manually copying the data. This integration can be configured for multiple Azure tenants.
While this imports user information from Azure within SysAid, the users themselves cannot access SysAid unless you also enable the Office 365 Single Sign On integration.
Important
If you have users that were imported via LDAP integration, to avoid duplicate users and problems with authentication, make sure that:
The users have the same email addresses in the Azure and LDAP repositories
The Sync user based on email address check box is selected in the Azure integration settings
To run these two integrations simultaneously, see Set Up Azure as a Secondary User Repository below.
From the SysAid Marketplace, get the Azure addon.
On the main My apps page, in the Azure icon, click
 .
.In the Azure dashboard, navigate to Azure Active Directory > Custom Domain Names.
Copy the name that's in the Available status.

Back in SysAid, paste the name into the Tenant Name field.
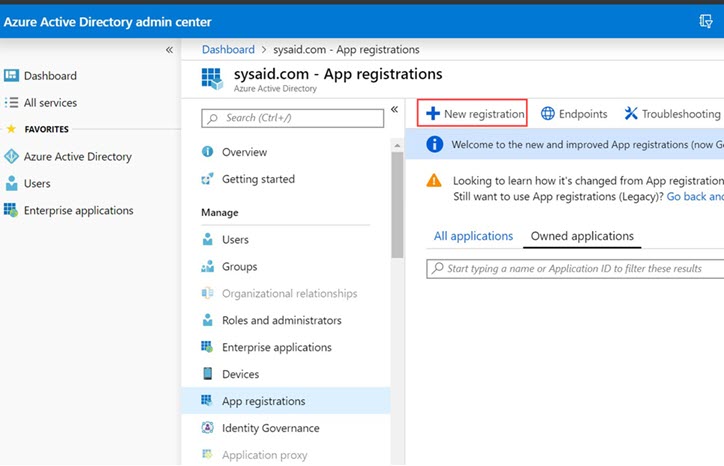
In Azure, navigate to Azure Active Directory > App Registrations.
Click New Registration.
In the Name field, enter a name for the application (for example "SysAid Login").
Click Register.

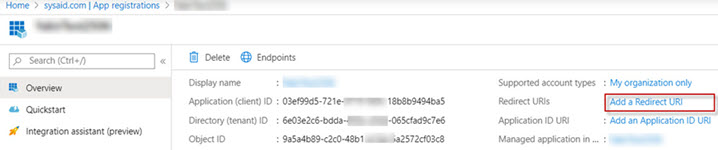
Back in the overview screen, click Add a Redirect URI.
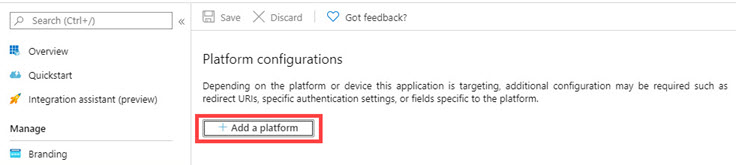
Click Add a Platform.
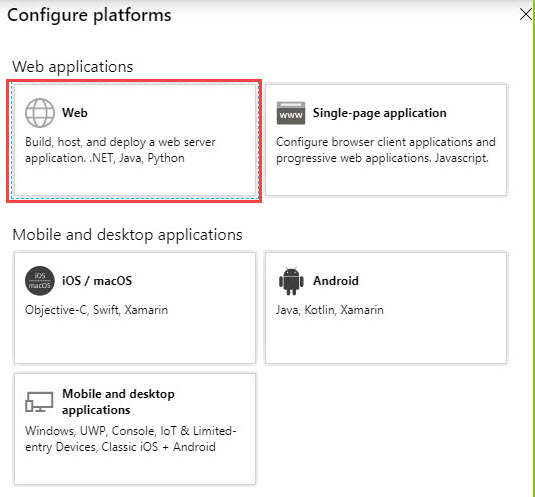
Click Web.
In the Redirect URL column, add your SysAid account URI.

Click Configure.
Click Overview.
Copy the application (client) ID.
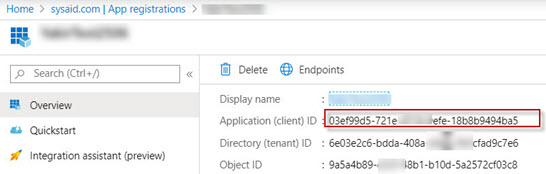
Back in SysAid, paste the copied text into the Client ID field.
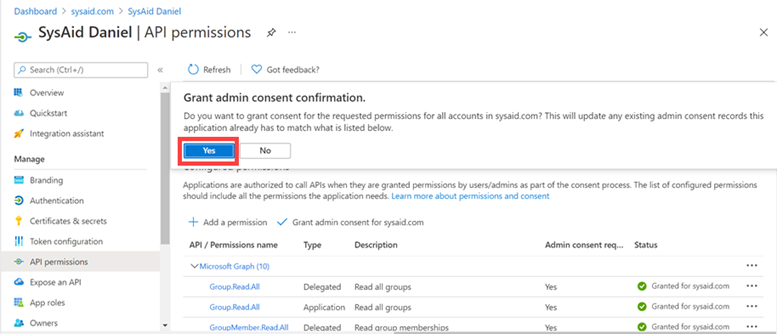
Set Microsoft Graph permissions in Azure.
In Azure, navigate to Overview > View API permissions.
Click Add Permissions.
Click Select an API.
Select Microsoft Graph.
Select the following permissions from the Application Permissions section:
Group.Read.All
TeamMember.Read.All
User.Export.All
User.Read.All
Select the following permissions from the Delegated Permissions section:
Group.Read.All
GroupMember.Read.All
User.Export.All
User.Read
User.Read.All
User.ReadBasic.All
Click Save.
In the Required Permissions section, click Grant permissions.
When prompted, click Yes.
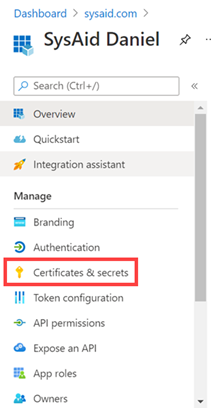
In Azure, configure a key.
Navigate to Manage > Certificates and Secrets.
Click New Client Secret.
Enter a key name in the description field.
Select the expiration date.
Click Add.
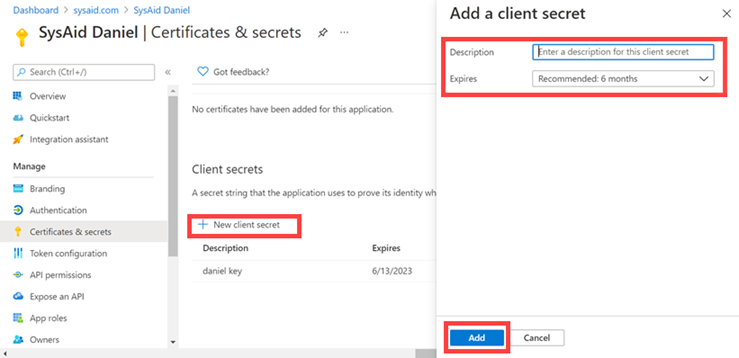
Copy the contents of the key's Value column.
Back in SysAid, paste the copied text into the Secret Key field.
Enter the domain you want.
If you are running SysAid version 20.1.14, enter the following default field mapping text in the JSON field to map.
{"fieldsMapping":
[{"sysAidName":"UserName" ,"azureName":"userPrincipalName", "type":"text"},
{"sysAidName":"FirstName" ,"azureName":"givenName", "type":"text"},
{"sysAidName":"LastName" ,"azureName":"surname", "type":"text"},
{"sysAidName":"Location" ,"azureName":"officeLocation", "type":"list"},
{"sysAidName":"Email" ,"azureName":"mail", "type":"text"},
{"sysAidName":"Department" ,"azureName":"department", "type":"list"},
{"sysAidName":"Company" ,"azureName":"companyName", "type":"list"}]}
Feel free to make any changes you like.
If you are running SysAid Cloud or a later On Premise version, see the next section for instructions on mapping fields.Click Save Changes.
Click the slider to activate the integration. Note: It could take up to 12 hours for your Azure fields to be synced with SysAid. Don't edit the integration until sync is complete.
 .
.


Set up Azure as a Secondary User Repository
If you are using another user depository (such as LDAP) with SysAid, you can select to set up Azure as a secondary user repository within SysAid. This allows you to take advantage of the SysAid features that require Azure integration while still using the user repository that you are most comfortable with.
To set up Azure as your secondary SysAid user repository:
Select the Azure is secondary to another User Repository checkbox.
Click Save Changes.
%20(1).png)
.png)